
MANUAL
PrintGear user guide
Welcome to PrintGear. Start with one product, try a simple design and build from there. This guide shows you how to set up your shop, help customers personalise products and prepare their artwork for printing.
1. Installing PrintGear
This chapter is for the shop owner. You need a WordPress website with WooCommerce installed and activated. Make a restorable backup before adding or updating the plugin, then keep your first test small: one product, one print side and one short design.
1.1 Download PrintGear Free or choose Pro
PrintGear Free 0.1.2 is available from the Free download form. It needs no account or license key. Follow the four steps below to download and install it. You can also try the public Free demo without signing in.
PrintGear Pro costs $39 per month, excluding tax, for one WooCommerce installation. The subscription renews automatically each month unless cancelled and can be cancelled monthly; there is no annual prepayment. Pro includes 100 AI Credits per subscription month, with each allowance valid for 30 days. Complete the Freemius checkout and use its download link and license; a separate printgear.app account is not required. Try the live Pro demo before buying. See the Pricing page for one-time credit packs and their validity.
1.2 Download and install the plugin
- Open the Free download form linked above. Enter your email, accept the required privacy checkbox, optionally choose product updates, then select Send verification link.
- Open the Verify your PrintGear download email and select Verify email and download within 24 hours. On the confirmation page, select Download PrintGear Free to save printgear-free-0.1.2.zip.
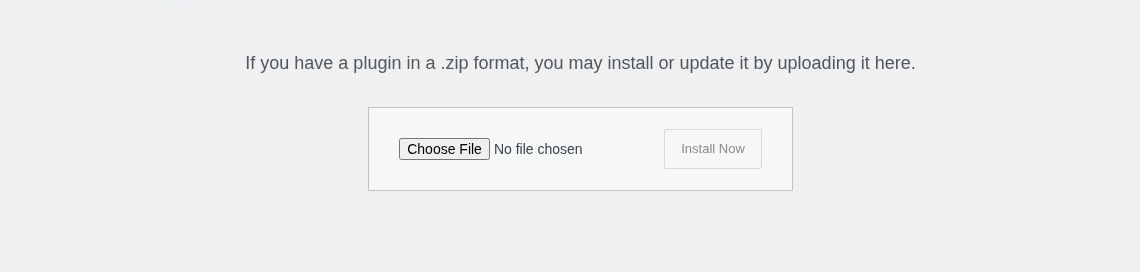
- In WordPress, open Plugins → Add New Plugin → Upload Plugin. Select the ZIP without unpacking it, then choose Install Now and Activate Plugin.
- Open PrintGear in the WordPress menu to begin the setup.
For an update, upload the new PrintGear ZIP through the same plugin installer and choose to replace the installed copy. Keep your backup until you have checked your test product. Do not delete an older WooCreate or PrintGear plugin as an update step: uninstalling it can remove the saved AI service connection. If you are moving from the old WooCreate folder, save a replacement Connection Key before removing that plugin and check the connection after activation. Installation files belong in the plugin installer, not in the Media Library.
1.3 Activate Pro or start with Free
For Pro, open PrintGear → License in your WordPress admin and activate the Freemius license supplied with your purchase. The PrintGear AI service connection is created automatically for an eligible paid license. If it remains disconnected, use the connection recovery option on that page or contact support. Existing trial and legacy installations can connect with a one-time PrintGear connection key. Keep license and connection details private. Free needs no license key or AI connection.
Pro includes the Starter Pack (Startup): 18 ready-to-import example products with mockups. For Free 0.1.2, open PrintGear → Add your first product, keep Choose this product selected on the included T-shirt, select the garment under Material of the product you will supply, then choose Import T-shirt as a draft. Review the WooCommerce draft and publish it.
2. Products and shop settings
2.1 Start with a ready-made product
The Startup collection gives you ready-to-import example products with professional mockups. It is a useful starting point for your own range: choose a template, import it and check it against the products you actually supply. These steps are for you as the shop owner; your customers use the finished product pages and designer.
Choose a starting point for your range
The Pro Starter Pack contains 18 product templates. Its cards show the supplied colours, sizes, mockups, printing information, and example prices. The Free T-shirt is the single included starting product, not the full Starter Pack.
| Group | Included templates |
|---|---|
| Clothing | T-shirt, women’s T-shirt, V-neck, women’s V-neck, longsleeve, women’s longsleeve, sweatshirt, women’s sweatshirt, hoodie, women’s hoodie, polo and women’s polo |
| Accessories and gifts | Five-panel baseball cap, tote bag, round pin button, guitar pick, photo puzzle and bandana |
Import your first product
- Open the Startup collection in PrintGear in your WordPress dashboard and choose the product template you want to add.
- Select the material where required, for example Cotton.
- Leave Save as draft selected while you prepare the product. This is the default.
- Choose Import selected product.
- Open the imported product in WooCommerce. Review its name, description, prices, available sizes and colours, mockups and printing setup before publishing.
You can also choose Publish now; I can supply these sizes and colours and my store is configured. Use that option once those conditions are true. The supplied prices are examples to review for your own shop. Importing a Startup product preserves your existing products and central printing rates.
Use the same template for several products
You can import the same template as many times as you need. Each repeat import creates a separate WooCommerce variable product with the name you enter. Your earlier product stays in place. This is useful for a range such as T-shirt 145 g/m², T-shirt 185 g/m² and T-shirt 205 g/m², or for shirts from different brands.
- Find the template you have already used. Its card shows Already imported. Select Import again.
- Choose the material where required and leave Save as draft selected.
- Choose Import selected product.
- When PrintGear asks whether you want to add the product as a new product, choose Yes.
- In New product, enter a clear name, such as T-shirt 185 g/m², then choose Import new product.
- Review the new product in WooCommerce and adjust it to match that item in your range before publishing.
The new name identifies the separate product. It does not change the physical item, its fit or its print dimensions. You can reuse a suitable starting setup, but check the description, product prices, sizes, colours, mockups and printing settings for each garment or brand. Changes to one product should be checked on that product.
Photo puzzle: keep the supplied format
The supplied photo puzzle is 30 × 20 cm, landscape, with 112 pieces. You can import it again as another product using that supported format. Its single-sided print setup and puzzle relief are fixed. Renaming the product or changing a variation label does not create another puzzle size.
For this Startup product, Product data → PrintGear explains that the supplied puzzle print settings remain active. You can edit the product name, price and variations in WooCommerce; those edits do not change its fixed printing format. Offer it only when the physical puzzle matches that setup.
Once you have checked an imported product, it can become part of your own catalogue. If you want to build a product yourself, continue with the product setup below.
2.2 Prepare a product
Start in Products with the normal WooCommerce details: product name, description, price, images and stock. Add the sizes and colours you sell as product options. Use names customers recognise, such as White, Black, S and M.
- Open Products, edit the product and choose Product data → PrintGear. Under General, tick Enable Designer for this product and choose its Material: Cotton, Polyester or Blend.
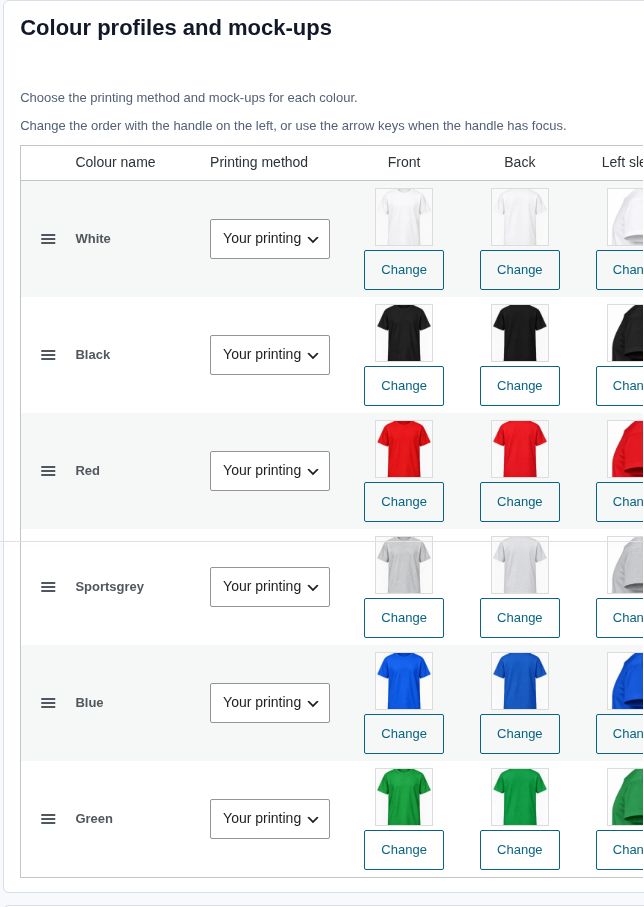
- In Colour profiles and mock-ups, choose the printing method for each colour. Use Change to assign the correct Front, Back and sleeve images. A mock-up is the product photo on which the design appears.
- In Print sides and design placement, tick the positions you print: Front, Back, Left sleeve or Right sleeve. Select a side and give it a clear Display name.
- For each side, set Maximum print format, choose Orientation in the Designer and set Placement on product (mock-up). Use the Preview to check the position.
- Choose Save PrintGear settings. Open the customer view and try an object near the edge of each print area. Check every product colour you offer.
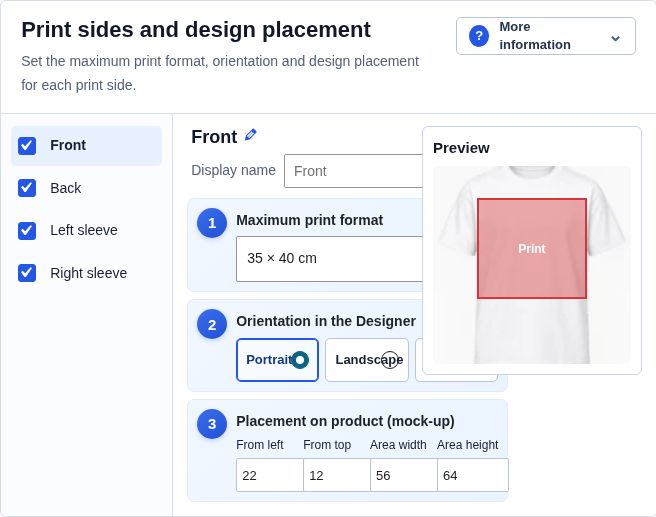
The mockup shows placement; the print area sets the permitted physical size. Check both. A 10 cm-wide design should look and print at the intended size, even when the product photo has different pixel dimensions. Start with your real production measurements rather than copying a print size from another product.
2.3 Set your printing prices
In the product’s PrintGear tab, open Pricing settings → Calculation. Choose Printing Cost to use the central rates or Custom for product-specific rates, then save the PrintGear settings. Manage the central tables in PrintGear → Printing Cost. Give each printing technique a name customers understand and enter its price for each print format. Prices are per printed side; the garment price is a separate part of the total.
Three terms help here. The canvas is the workspace. The design dimensions are the width and height occupied by the artwork. A price category is a rule used to price that artwork. Making the canvas bigger is not the same as changing the price category.
- Try a small design and note the printing charge.
- Enlarge the design and check whether the correct price category is selected.
- Add another printed side and check the new total.
- Change sizes and quantities, then compare the designer, basket and checkout totals.
- Edit the design from the basket and check the recalculated price again.
Use your own production rates. Taxes, garment variations, discounts and shipping remain part of your shop’s WooCommerce setup. Make the reason for a price change clear to customers.
Quantity discounts
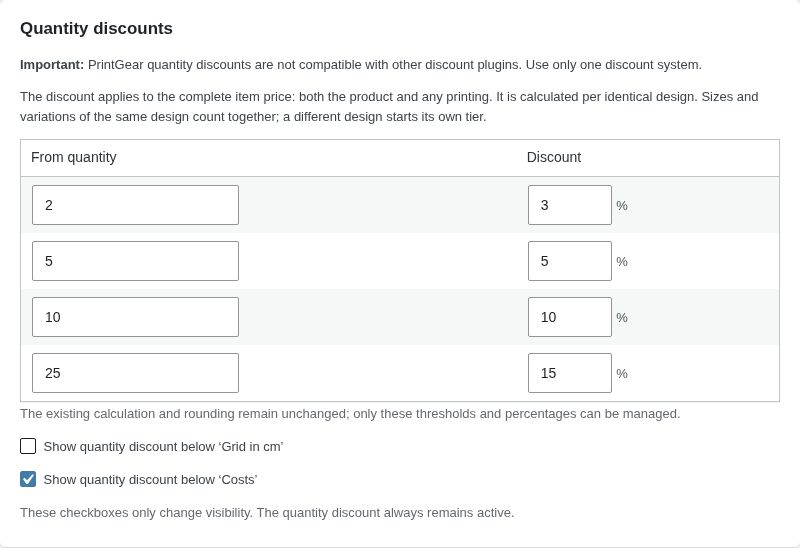
Open PrintGear → Printing Cost → Quantity discounts. Enter the starting quantity and discount for each tier. The discount applies to the whole item price, including the garment and its printing. Sizes and variations of the same design count together; another design starts a separate tier. Use one discount system for these products so that two plugins do not both apply a discount.
The options below the table control where customers see the discount information: below Grid in cm or Costs. Hiding this explanation does not switch off the discount itself. Check a basket containing two sizes with the same design to see how the tier is applied.
2.4 Make the designer feel at home in your shop
Appearance and wording
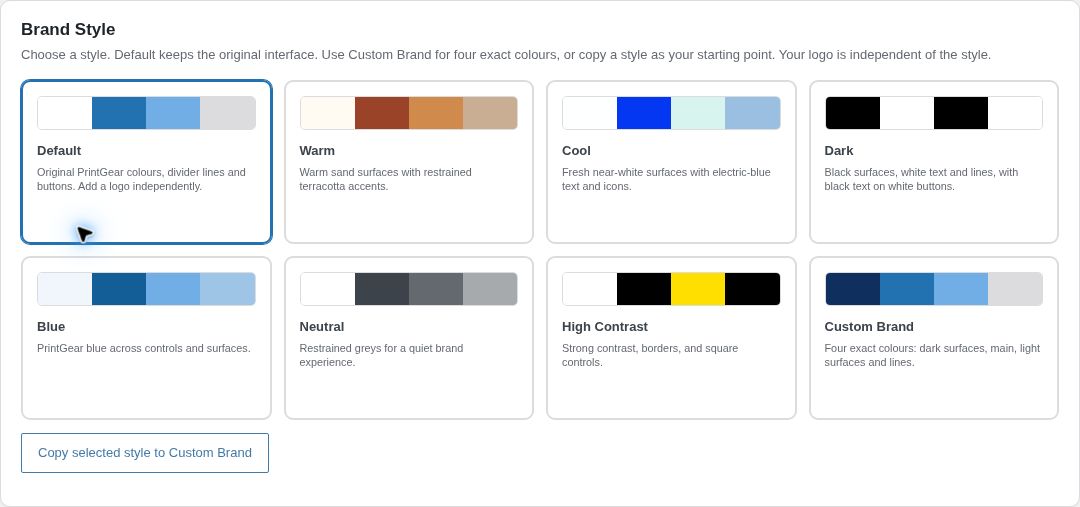
Open PrintGear → UI & Branding and enable Use these style and logo settings. Choose Default, Warm, Cool, Dark, Blue, Neutral or High Contrast, or use Custom Brand for your own four colours. You can copy a preset to Custom Brand as a starting point.
In Logo, choose Show logo in the designer and select your image with Change logo. The logo is independent of the colour style and is used on desktop and mobile. Select a Preview Product and choose Open Designer Preview to try your unsaved choices. Choose Save Changes when you are happy with them.
Use PrintGear → Labels to change customer-facing wording. Keep each instruction short and useful: “Continue designing” tells a customer more than “OK”. Save your change and reopen the relevant panel to see it in place.
Fonts and print colours
Open PrintGear → Settings → Fonts. In Font selection, choose the standard collection or build your own Google font list. Offer a manageable selection that suits your products. Use the previews, then test names with accents, numbers and punctuation. The local Google Fonts option lets your website serve the font files itself.
Open PrintGear → Settings → Printing Colours. In Colour selection, choose the standard palette or create a custom list. Give colours clear names and drag them into the order you want. Put the colours customers use most where they can find them quickly. Product colour changes the garment; print colour changes text or artwork. They are different choices.
2.5 Let customers share a design

Sharing lets a customer send someone a design before ordering it. For example, a team organiser can ask a colleague to check the layout. The shared view can include the mock-up, quote and a route to order; sharing itself does not place an order or reserve products.
- Open PrintGear → Sharing.
- Under Availability, tick Enable sharing.
- Under Share button, enter a Button label or leave it empty to use the automatic storefront text. Save your settings.
- Open the designer on a computer. Choose Share, send a test to your own email address or complete a WhatsApp test, then open the received link. Check the design and order information.
The Share action appears in the desktop designer and stays hidden on tablet and mobile. For email, the customer enters a recipient and message. For WhatsApp, the customer finishes sending in WhatsApp. Share links are for the people they are sent to; keep your own source artwork rather than using a shared link as a permanent archive.
2.6 Understand AI access and credits
Freemius manages your paid license, renewals and invoices. PrintGear → Buy Credits in your WordPress admin shows your AI Credit balance and opens secure checkout for one-time top-ups. AI design generation creates or changes artwork from a prompt. Background removal separates a subject from its surroundings. They are different operations, so first identify which action you want to check.
Review the balance in PrintGear → Buy Credits before running a series of AI tests. The monthly Pro subscription includes 100 Credits per month; each allowance is valid for 30 days. New prepaid bundles are 100 Credits for $25, 250 for $50, or 500 for $85, excluding tax, valid for 90 days. Previously purchased Credits keep their original validity. Credits expiring soonest are used first; there are no automatic top-ups or charges after use. PrintGear for WooCommerce and the separate AI Studio for Fancy Product Designer have different credit balances.
Customers use the tools inside your shop. If an AI service is temporarily unavailable, help them keep their original image and try again later. Check the connection and credit status in your WordPress admin to investigate the cause; a general customer message is not a diagnosis.
2.7 Statistics and useful error details
Open PrintGear → Statistics to review feature usage. Use WooCommerce orders to check purchases, payment and fulfilment. A tool being used is not the same as an order being paid.
For a specific problem, open PrintGear → Settings and use the Logs section. Note the time and time zone, reproduce the problem once and collect the relevant details. Switch logging off again when the investigation is finished. Keep credentials and customer information out of public screenshots.
2.8 Sell printed products only
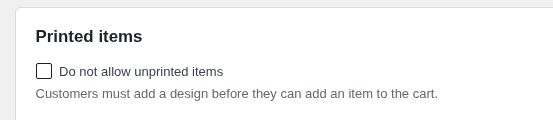
Open PrintGear → Settings → Printed items, tick Do not allow unprinted items and save. Customers must then add a design before adding a PrintGear product to the basket. A design on one printable side is enough; you do not have to require printing on every side.
Try the product with no artwork. The A design is required window should send the customer back to designing. Then add a short text and check the normal order flow and price. This is a useful quick check before you announce a printed-products-only policy.
Change the message customers see
Go to PrintGear → Labels → Ordering & cart → Required design. Edit Title, Message and Continue designing button. For example: “Please add your design” with a short explanation of your shop’s policy. Grey text is the automatic wording. Clear a Custom field and save to return to the automatic text.
2.9 Show a holiday or shop notice
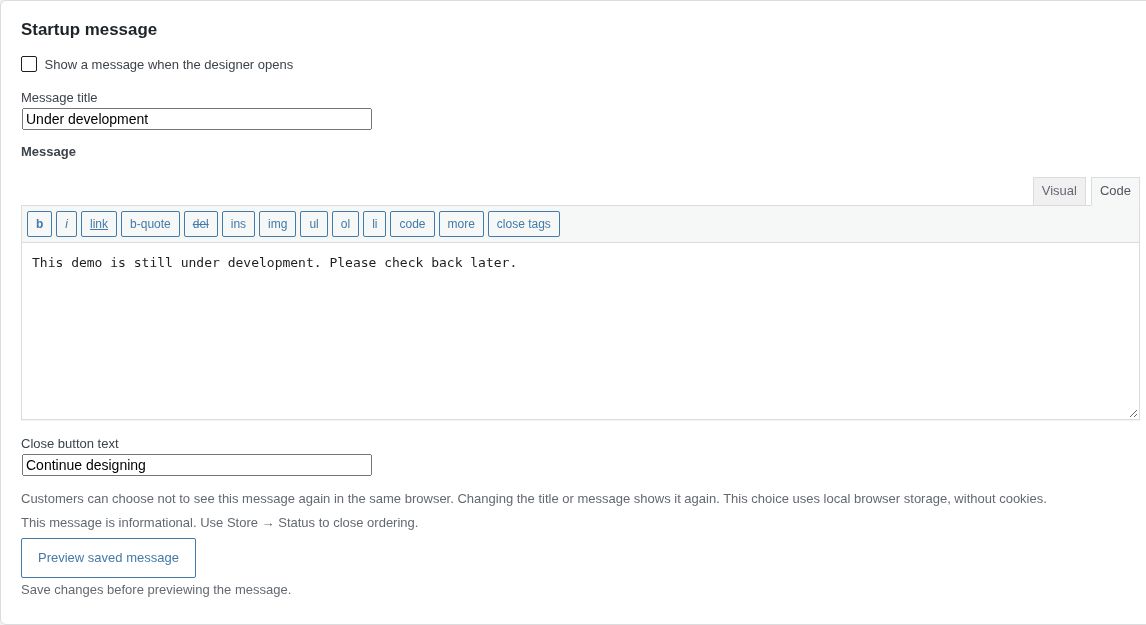
A startup message is a useful way to explain a holiday, a longer lead time or another shop announcement. It is managed under Settings, separately from the general Labels.
- Open PrintGear → Settings → Startup message.
- Tick Show a message when the designer opens.
- Enter a Message title, such as “Holiday opening times”.
- Write the Message. Use Visual for formatted text or Code for HTML. You can include paragraphs, emphasis, lists and safe links.
- Set Close button text, for example “Continue designing”. Save, then choose Preview saved message and try opening the designer as a customer.
For example: “We are on holiday until 12 August. You can still design and order; production resumes on 13 August.” Make the dates bold in the editor and add a link to your delivery information. Use the real dates and promises for your shop.
Customers can choose not to see the notice again in the same browser. Changing its title or message makes it appear again. This preference uses local browser storage. The notice informs customers; it does not close ordering.
Let customers design while ordering is closed
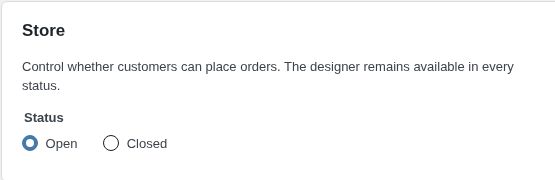
Open PrintGear → Settings → Store → Status, choose Closed and save. Customers can still use the designer, but cannot place orders through it. Set the status back to Open when ordering resumes. Use a Startup message alongside it to explain when you will be back.
2.10 Show a Design button in product lists
Open PrintGear → UI & Branding → PrintGear frontend. Under Design button in product listings, enable Show ‘Design’ for products in the shop, categories and search results. Choose Save frontend settings, then check a product listing. Customers can now start the designer from a product card.
In the same section, choose After ordering → Cart or Checkout for the next step. The designer itself runs on a dedicated, theme-independent application page. It does not have to fit inside your theme’s product-page sidebar.
3. Using the designer
3.1 Your first design
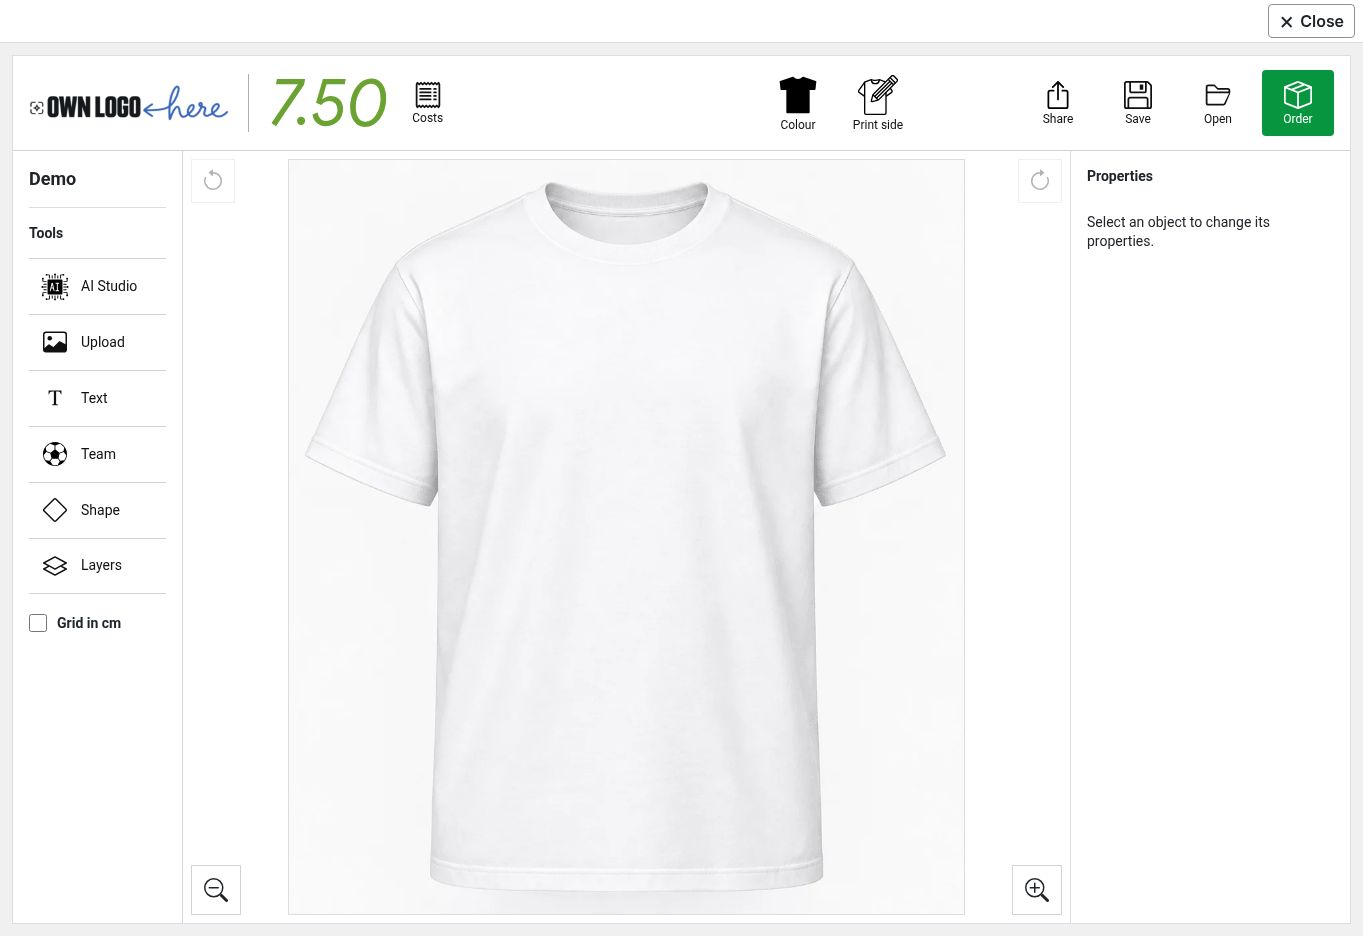
Choose the product colour and print side at the top. In Pro, the desktop menu opens AI Studio, Upload, Images, Template, Text, Team, Shape, and Layers; the shop owner can change tool visibility and order. In Free 0.1.2, the tools are Upload, Text, Shape, and Layers. Select a tool or object to show its controls on the right.
- Open the product’s designer and choose a colour and print side.
- Add a short text or an image. Click or tap the object to select it.
- Drag it into place and use its handles to resize or rotate it. Keep it inside the print area.
- Review the other print sides you want to use.
- Choose Order, enter sizes and quantities and review the price before adding to the basket.
The zoom controls change your view of the workspace. They do not change the printed size. Grid in cm helps you judge placement. After an upload or another operation, wait for the result before continuing.
3.2 Add and edit your own images
In Pro 3.3.41 and later, choose Images to use the built-in image library. Enter a term in Search images or choose a category such as Animals, Plants, Food, People, Sports, Vehicles, or Objects. Select an image card to place it directly on the current print side; use Show more to see further results. Searching and placing a library image use no AI Credits. On a phone, swipe the bottom tool row until Images is visible, tap it, search or browse, then tap a card. The panel closes after placement. Shop owners can open PrintGear → UI & Branding → Desktop or Mobile, tick Images to show the tool, use Move Images up/down to change its position, then choose Save Desktop Settings or Save Mobile Settings. The Free 0.1.2 designer has no Images library.
Choose Upload and select an image from your computer or phone. Use the original file when you can: a screenshot or a picture saved from a messaging app may contain less detail. Once the image appears, select it and adjust its position and size.
With an uploaded image selected in Pro, the right Image panel offers Remove background, Crop, Edit photo, and Filters. Open Filters, then scroll down inside the two-column style grid on desktop to see all 12 looks, including Black & white and Sepia. The scrollable filter list is in Pro 4.1.1 and the live 4.1.2 demo. Review the preview before choosing a look.
For a larger print, start with a sharp image containing enough pixels. Raising a DPI number does not add detail. A white background is also different from transparency: white remains part of the image unless you remove the background.
Crop to the part you need
Select the image and open the crop tool. Choose the area to keep, confirm the crop and check the placement again. Cropping is useful for removing empty space; it cannot make a blurred source sharper. Keep the original file so you can start again.
Improve a photo before you print
Sometimes a customer has the right photograph, but the file needs a little help. PrintGear’s photo-editing tools let you improve a photo, clean up a photographed drawing or give an image an artistic style. Start by deciding what you want to keep: the original memory, the character of a drawing, or just the subject as a starting point for something new.
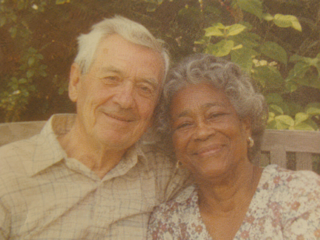
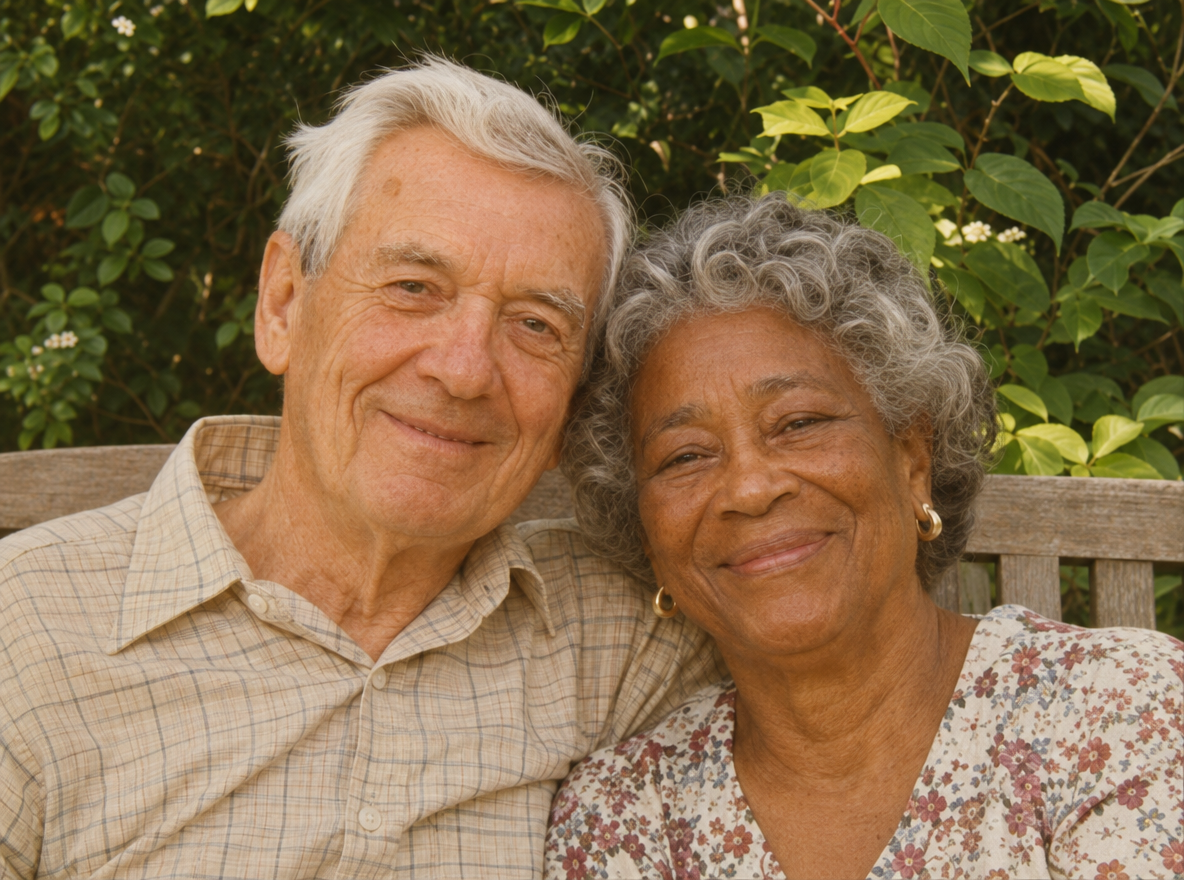
Photo enhancement is the choice for improving a photograph rather than deliberately turning it into an illustration. The example starts with a 320 × 240-pixel image; its actual PrintGear result measures 1184 × 880 pixels. Faces, clothing and other details appear clearer, but a larger output is not proof that every detail was present in the original.
- Keep the original file and upload the photo you want to work with.
- Use Photo enhancement when you want to improve the photograph. Choose an artistic style instead when changing its appearance is the goal.
- Compare the result with the original. Look closely at faces, eyes, hands, lettering and small patterns. AI can change or reconstruct details.
- Place the result at its intended print size and check it again. Keep the version that best suits the customer’s request.
A useful improvement on screen still needs a production check. The pixels available, the physical print dimensions and the artwork itself determine how far you can enlarge it. Changing a DPI number does not create detail, and enhancement is not an automatic guarantee of print readiness.
Prepare a child’s drawing
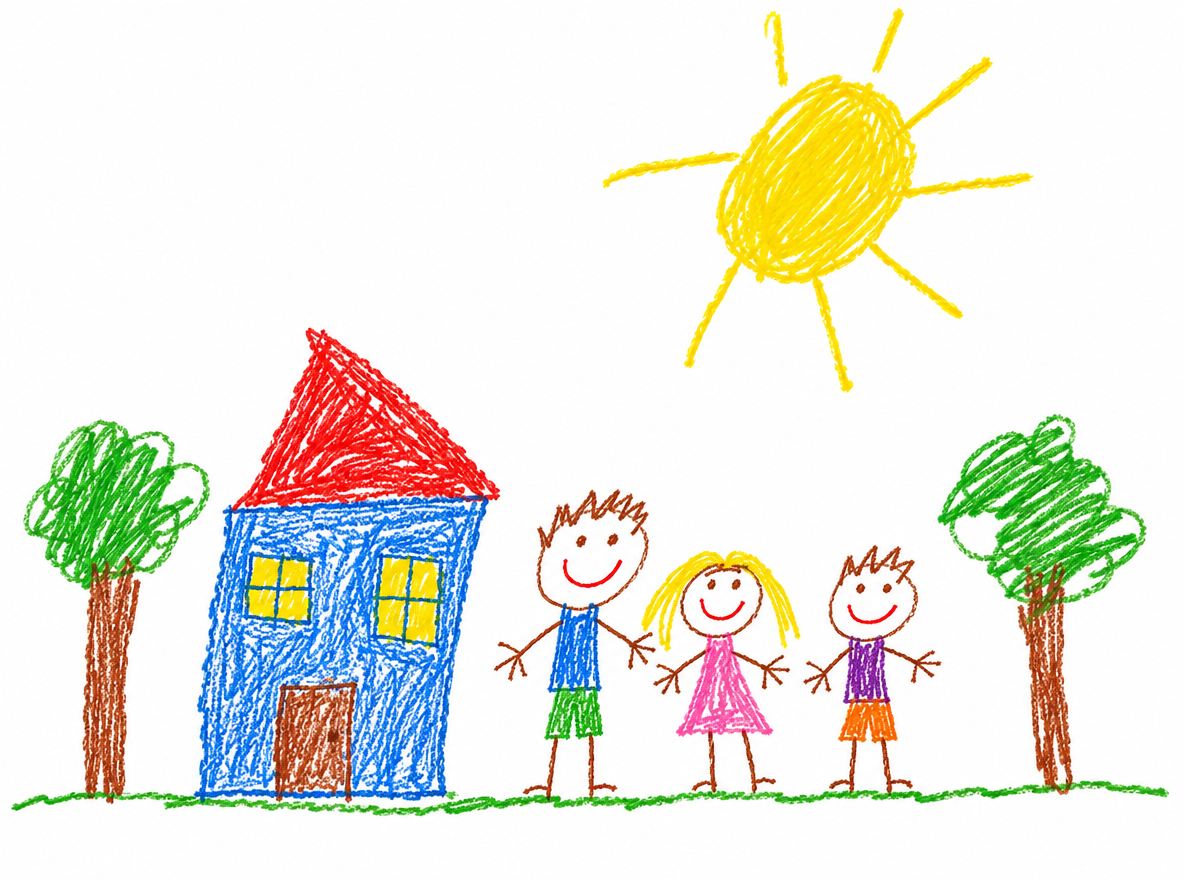
A photographed drawing often includes folds, shadows and the colour of the paper. Use Drawing cleanup to remove those distractions while keeping the child’s lines and colouring. Start with an evenly lit photograph or scan that shows the whole drawing clearly.
Work in this order: photograph or scan → Drawing cleanup → Remove background → place on the product. Cleanup and background removal do different jobs. Cleaning the paper does not by itself mean the image has a transparent background.
Compare the cleaned version with the original before removing the background. Check the handwriting, thin lines and colours that matter to the child. After background removal, inspect pale pencil marks and any white areas that belong to the drawing against the actual garment colour.
Give a photo a different character
Choose an artistic style when you want a new interpretation of the subject. A pet portrait can become a painted image, an engraving or a handmade-looking illustration. These are photo-editing styles; keep them separate from the style choices used when generating a new design in AI Studio.
| Style | What it adds |
|---|---|
| Oil painting | Visible brushwork and a painted surface. |
| Pencil | Drawn lines and soft graphite shading. |
| Watercolour | Soft washes and delicate edges. |
| Linocut | Bold shapes with a carved-print character. |
| Paper art | Layered shapes with a cut-paper appearance. |
| Pop art | Graphic contrast and expressive colour. |
| Embroidery look | A stitched appearance within a printable image. |
| Sculpted clay | A hand-modelled, three-dimensional-looking character. |
| Engraving | Fine lines and an engraved illustration style. |
| Crochet pattern | Loops and yarn textures with a handmade appearance. |
| Black & white | A monochrome treatment. |
| Sepia | Warm brown tones. |
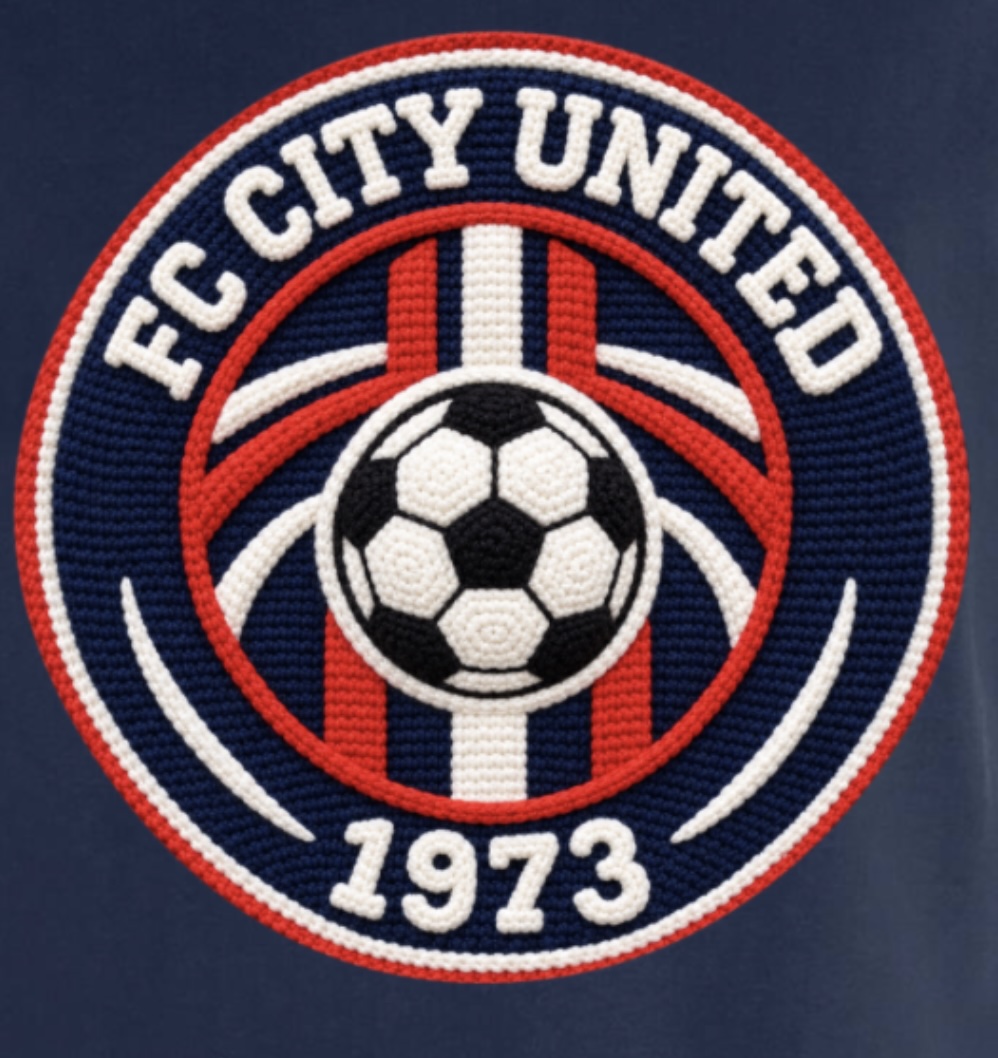
Embroidery look and Crochet pattern create a visual texture for printing. They do not produce real embroidery, an embroidery digitising file or a stitch programme. Explain that finish clearly when offering the effect on a shirt or cap.
Review recognisable features, small lettering and fine textures before ordering. A styled result is not automatically a vector file. A canvas print is one possible use for the artwork; the canvas mockup shown on the photo-editing page is an application example and is not included in the Startup collection.
For more before-and-after examples, see Photo editing for WooCommerce. Use the current Pricing information for costs and included usage.
3.3 Add and edit text
Choose Text, enter your wording and choose a font and colour. Select the text object to move, resize or rotate it. Use line breaks to turn a long sentence into a balanced composition, then check how the lines fit on the product.
Keep wording as a separate text object when you want to edit it later. A name inside an uploaded picture is part of that picture; the text tool cannot rewrite it. Check spelling, accents, dates and contrast against the final garment colour.
Pro includes ready-made text styles (Template, available in released Pro 3.3.37 and later). Choose Template, enter up to 30 characters in Type your text here, then use Choose your style and select a style card. The transparent styled design is placed on the current print side. Select it to move and size it. Generated lettering can use AI Credits; the locally created Scrabble Tiles style does not. Template visibility and position are set separately for Desktop and Mobile under PrintGear → UI & Branding. Free 0.1.2 has plain Text, but no Template tool.
3.4 Build with shapes
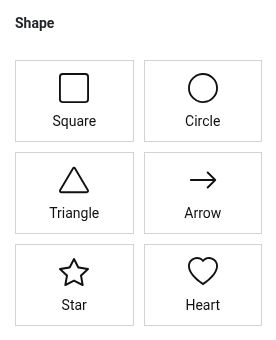
Choose Shape and select a square, circle, triangle, arrow, star or heart. It becomes a separate object, so you can move it independently from your text and images. A circle behind a name is a simple way to build a badge.
Select the shape to set its fill, line colour and line thickness. Fill colours the inside; the line forms the outline. Change the outline thickness in millimetres. Use the object handles for its size and rotation, then check the proportions beside your other objects.
A white fill is a white area, not a transparent hole. To put a shape behind text, use Layers. To remove the selected object, choose the delete-selection control.
3.5 Personalise a team with names and numbers
Create one shared design for the whole team. Put the club logo and any wording that stays the same on the shirt first. Select the front or back print side, then open Team. The name and number you place are examples for positioning; enter each teammate’s actual details when you order.
- Choose Place name and/or Place number on the selected side. Drag each example into place. Use the handles to adjust its size and the cross to remove it if needed.
- Set one font and text colour for all Team names and numbers. Adjust name and number heights separately. A name can be up to 6 cm high and a number up to 25 cm high, subject to the product’s print area. You see the changes on the shirt immediately.
- Check every print side you use. Leave room for the longest permitted name and for a two-digit number. Team names accept up to eight letters; numbers accept up to two digits.
- Choose Order. The order list shows only the name and number columns you placed. Choose Add teammate, enter each person’s name and/or number, and select their garment size. Front and back numbers can differ. Check every row and the delivery date, then choose Add to cart.
Everyone receives the same base design in their chosen size, with their own name and/or number. Use ordinary Text for words that should be identical on every shirt.
3.6 Create with AI Studio
AI Studio is a Pro tool. Select AI Studio, then choose Create from a photo to upload an image or Design for me to start with a written Description. In Create from a photo, use Upload image, add a Description (optional), and Choose a style. In both tabs, select the output type Design or Emblem, then Generate design. In the live Pro 4.1.2 interface, hovering over a photo style on desktop reveals its name. With a photo, describe the details you want to keep recognisable.
If you want to improve an existing photograph or prepare a photographed drawing, start with photo editing. Use AI Studio when you want to describe a new design or composition. Enhancement, artistic restyling and background removal serve different purposes.
Design or Emblem: which output type should you choose?
Choose Design for a portrait, an animal illustration, or a scene. In Create from a photo, select Upload image first, enter a Description (optional), and choose a style. Use Remove background separately when you need a cutout.
Choose Emblem for a club badge, event mark, or design that brings symbols and wording together. You can use either Create from a photo or Design for me. An emblem can be illustrative; it does not have to be a simple symbol.
Emblem describes the intended design. It does not promise a vector file or perfectly rendered lettering. For words you must be able to edit, add a separate Text object afterwards.
Write a prompt that gives AI a clear direction
A prompt is the instruction in Description. In Design for me it is required; in Create from a photo, Description (optional) can guide the result. Explain the subject, purpose, and details you need as if you were briefing an illustrator.
- Name the result: for example, a club badge or a painted pet portrait.
- Describe the subject. With a photo, name the features you want to keep, such as markings, glasses or an ear position.
- Put exact wording in quotation marks. Say “no text” if you do not want any.
- Give a few colours and a layout, such as a central portrait with the name above.
- Choose a style that fits the request. Keep the prompt consistent with it.
Try a personal image
Choose AI Studio → Create from a photo → Upload image and select your dog photo. Choose the Design output type and the Painting style. In Description (optional), enter: “Create a painted illustration of the dog in my photo. Keep its coat markings and ear position recognisable. Place it centrally, leave space around the head and do not add text.” Then choose Generate design. If you need a cutout, use Remove background after reviewing the result.
Try a team badge
Choose AI Studio → Design for me, select Emblem, then enter this Description: “Create a round beach volleyball badge with two playful cats. Put ‘The Kittens’ above and ‘Amsterdam 2026’ below. Use navy, white and pink, with clear outlines. Include no other text.” Choose Generate design.
The example gives AI a subject, exact words, colours and a composition. For your own project, replace those details with the team’s real name and the colours that suit the garment.
Generate, inspect and improve
Check the selected tab, photo when used, Description, output type, and style when offered, then choose Generate design. Review the result before placing it on the product. Look at spelling, recognisable features, small details, edges, and contrast.
For a useful next attempt, change one clear thing: “use fewer small details” or “make the name easier to read”. A new generation can also change details you liked. Keep the result you prefer and check its final print size. An attractive result still needs a production check.
3.7 Remove a background
Background removal isolates the subject from its surroundings. It is a separate action from asking AI to redraw or restyle a photo. Select the image, choose background removal and wait for the result.
Review hair, fur, smoke, gaps and translucent edges against the actual product colour. White in a subject, such as a shirt or a dog’s markings, can be important detail. Removing the background should not be confused with removing every white pixel.
For photographed drawings, use Drawing cleanup first, then remove the background. Check the drawing’s light marks and important white areas against the product colour.
3.8 Arrange objects with Layers
Open Layers to work with the individual objects in your design. Select the object you want to change. Use the layer order to put a shape behind a name or bring a foreground image above another element. Check the result on the canvas after each change.
If an object seems to have disappeared, it may sit behind a larger object. Select it through Layers and review its position. Keep your photo, editable wording and decorative shapes separate when you want to adjust them independently.
3.9 Check print areas and sides
The print area marks where your artwork can be printed. Keep the whole composition inside it. A tiny object near an edge can make the overall design too large, even when the main picture fits.
Use Print side to move between Front, Back and the sleeve positions offered for the product. Build and check each side individually. Adding artwork to the front does not copy it onto the back.
If a size warning appears, select the affected object and make it smaller or move it inward. Check all objects, not just the largest one. After changing a garment colour or product option, review the sides, placement and price again.
3.10 Design comfortably on a phone
On a phone, swipe the bottom tool row to reach tools that are not immediately visible. In Pro, tap Images, search or choose a category, then tap a result card to place it. The selected image opens in focus mode with a small garment view; use Open full garment view to review the whole product. Select an object, move it with one finger, and use a pinch gesture to resize it. The shop owner can change the Mobile tool order and visibility in PrintGear → UI & Branding.
Return to the overview to judge the whole design. Close the keyboard when it covers controls. Rotating your phone changes the screen layout, not the intended print dimensions. Check the full preview before ordering.
3.11 Preview, save, reopen and share
Preview every printed side
Use the product preview to review spelling, size, alignment and contrast. Check each side you used. The preview helps you judge placement; the screen and garment photo cannot guarantee an exact match to the final fabric or print colour.
Save and Open
Choose Save and complete the saving steps shown in the designer. To continue later, use Open and select the saved design. Keep the original files as well: an open browser tab is not a design archive.
Share for someone to review
On a computer, choose Share → E-mail, enter the recipient and add a message. For WhatsApp, finish sending in the app or window that opens. A shared design lets someone review the idea; it does not confirm an order. Keep the full link and use it within the shop’s sharing lifetime.
3.12 Sizes, quantities and the basket
Choose Order, enter the sizes and quantities you need and review the total. For Team orders, add one row per teammate in the order list and choose a size for each. Review their names and numbers before adding the order to the basket. Check the product, printed sides and any warnings before choosing Add to cart.
In the basket, check the design and the quantities again. To change the artwork, open the edit action on that basket line, make the change and confirm it in the designer. Return to the basket and check the updated line and price.
A product without artwork follows the shop’s ordering rules. If a message asks you to add a design, return to the designer and add the artwork you want printed. After placing an order, contact the shop about changes; editing an earlier design does not automatically update an existing order.
4. Orders and production
Open the order in WooCommerce and work through the PrintGear designs on its product lines. Start with the customer’s choices: product colour, sizes, quantities, printed positions and any team names or numbers.
- Check that each printed item has the intended design.
- Review every printed side and compare it with the order details.
- Open the production file for the side you are preparing.
- Check physical dimensions, image quality, cropping and transparency in your production software.
- Check scale and placement in the printer software before starting the print.
Use the production file for printing; the product preview is for checking placement. Inspect the supplied file’s format and dimensions for your printing process. An origin label, such as text plus uploaded image, helps you understand the composition, but does not replace checking the artwork.
If a design or side is missing, pause that item and investigate before printing. Keep the order number and the exact message. Do not reconstruct a customer’s artwork from a small preview without agreeing that with them.
Team orders
In the WooCommerce order, open the Team production matrix. Each row represents one teammate and shows the selected size and any front or back names and numbers. Compare the rows and size totals with the order before starting production. The example text in the design is a placement guide; the values in the order list are the details to print.
Prepare and check the individual production file for each teammate and printed side. Match the name, number, garment size and print position to that row. If a value or file is missing or does not match, pause that item and clarify it before printing.
To change the customer instruction in the Team panel, open PrintGear → Labels → Ordering & cart → Team mode → Uitleg in Team-venster. Leave the field empty to use the automatic wording.
5. Help for customers
My image will not upload
Read the message and check the file type and size. Try the original file and give the upload time to finish. If one image keeps failing, try a standard re-exported copy while keeping your original. Tell the shop which step failed and include the message.
AI or background removal is temporarily unavailable
Keep your original image, wait a little and try again. If the problem continues, tell the shop whether you were generating a design or removing a background. Include the time and any message; the message alone does not mean your photo is faulty.
My edited photo looks different from the original
Compare both files closely. Enhancement can reconstruct details; an artistic style deliberately changes the appearance. Keep your original, check which operation matches your goal and review faces, lettering and small details before placing an order. Ask the shop if an important feature no longer looks right.
My design is too large
Check the active print side and every object near the border. Move the artwork inward or make it smaller. If you still cannot see the problem, send the shop a screenshot showing the entire print area and the warning.
I cannot add the product to my basket
Check sizes, quantities and design warnings. Wait for uploads and AI actions to finish. If it remains blocked, save the message for the shop. After an unclear attempt, check the basket before adding the same product again.
A shared link does not open
Check that you copied the whole link. The link may have expired, so ask the sender to share the design again. For payment, delivery or changes to an existing order, contact the shop where you ordered.
6. Help for shop owners
Find the step that needs attention
Record the product, print side, browser, device, time and exact message. Try a simple design on a controlled test product. Change one setting at a time, so you can see what made a difference.
For upload problems, compare two files and check whether the failure happens during upload or in the next operation. The designer runs on its own application page. If it appears cut off, record the designer URL, device and screenshot; check separately whether the problem is on the product page or inside the designer. For basket problems, compare a new design with an edited basket design. Check saved order information before deleting an item or asking a customer to order again.
Nomi and PRO support tickets
Nomi is PrintGear’s AI assistant and is available to Free and PRO users. Ask in your own language for a quick answer, and ask follow-up questions in the same conversation. Nomi uses this guide and current public PrintGear information. You can also search this guide whenever you prefer written steps.
Personal support tickets are available with an active PrintGear PRO subscription or valid lifetime access (Pro 4.1.6 and later). In your shop’s WordPress admin, open PrintGear → Support above License. Enter your question and choose Send ticket. Your ticket is created immediately; view its status and send follow-up replies on the same admin page. We aim to reply within two working days (Monday–Friday). No email verification or separate printgear.app account is needed. In Free 0.1.2 and later, PrintGear → Pro & Help links to this English guide and Nomi in your own language; Free has no ticket form. If you use Free and have already tried this guide and Nomi but are still stuck, email your PrintGear question to [email protected]. Briefly say what you tried and include the exact error message, without passwords or customer data. This is an email request, separate from the PRO ticket service; we cannot promise the PRO response target for it.
Nomi reuses useful guidance from the manual. Customer questions, generated replies and personal details are not copied into automatic knowledge. Nomi chat and PRO support tickets have separate handling; see the Privacy Notice.
PRO ticket support helps with using PrintGear, explaining settings, assessing error messages and investigating PrintGear bugs. It does not include logging into your server or WordPress dashboard, building your shop, custom development or repairing hosting and other plugins.
Describe the steps you took, the exact message and the relevant screen. Remove passwords, connection details and unnecessary customer information. Keep your ticket details private. If Nomi is unavailable, eligible PRO and lifetime users can still open PrintGear → Support in their WordPress admin.
7. Frequently asked questions
Can I try PrintGear before buying?
Yes. Try the public Free demo or download PrintGear Free to start with the included T-shirt. The Pro demo lets you explore Images, Template, AI Studio, and the full Starter Pack. Pro costs $39 per month, excluding tax, and renews monthly unless cancelled.
Do customers need an account to design?
The public designer is available to visitors. PrintGear Free users can use Nomi and this guide in their own language. Personal tickets are available with an active PrintGear PRO subscription or valid lifetime access through PrintGear → Support in the shop’s WordPress admin (Pro 4.1.6 and later). The ticket appears there immediately after you choose Send ticket. Account-based saving has separate steps.
Do I have to use AI?
No. You can create a design with uploaded images, text and shapes. AI Studio is another creative tool.
Can I combine a photo and a name?
Yes. Upload the photo and add the name as a separate text object. You can then adjust each independently.
Can I improve a low-resolution photo?
Photo enhancement can give a clearer result. Compare it with the original and check it at the intended print size. More output pixels do not guarantee that every detail has been authentically recovered. See Improve a photo.
Does Drawing cleanup make the background transparent?
No. Drawing cleanup removes distractions from the photographed paper. Use background removal afterwards when the drawing should appear on the product without its paper surround.
Do Embroidery look and Crochet pattern create real embroidery?
No. They create texture within an image for printing. They do not produce an embroidery digitising file or a stitch programme.
Can each team member have a different name?
Yes. Place the Team name and/or number fields once in the shared design. In the order list, enter a separate name, number and size for each teammate. Keep wording that everyone shares as ordinary Text.
Will AI keep my photo exactly the same?
AI can change details. Describe the features you want to preserve and inspect the result before using it.
What is the largest print size?
Use the print area configured for that product and position. A sleeve and a full front need different physical limits.
Why does the price change?
The product options, quantity, design size and printed sides can affect the total. Check the calculation and basket after changing them.
Is sharing the same as placing an order?
No. Sharing sends a design for someone to view. An order is placed through the basket and checkout.
Can I add these AI tools to Fancy Product Designer?
Yes. AI Studio for Fancy Product Designer is a separate WordPress add-on for existing Fancy Product Designer stores. Its single-site license is a $29 one-time purchase, excluding tax, with 50 included credits. Its top-ups are 100 credits for $10, 250 for $20, or 500 for $35; purchased credits do not expire. It does not activate PrintGear for WooCommerce or share its Pro credit balance. See the AI Studio for FPD pricing page.
Is a generated image ready to print immediately?
Check spelling, recognisable details, edges and the artwork’s physical dimensions first. Then check the supplied production file in your print workflow.
8. Glossary
| Photo enhancement | AI-assisted improvement of an existing photograph, with details to review against the original. |
| Drawing cleanup | Cleaning distractions from photographed paper while retaining the drawing’s character. |
| Printed texture | A visual material effect inside printed artwork, rather than actual stitches or yarn. |
| Term | Meaning |
|---|---|
| Designer | The workspace where the customer creates a design. |
| Object | One image, text item, shape or personalisation field. |
| Print side | A configured position, such as Front, Back or Left sleeve. |
| Print area | The physical area in which the artwork must fit. |
| Mockup | A product image used to show the design’s placement. |
| Canvas | The workspace used to build the design. |
| Design dimensions | The width and height occupied by the artwork. |
| Price category | A configured rule for calculating printing charges. |
| Transparency | Areas of an image with no opaque background. |
| Prompt | The instruction you give AI in Description. |
| Image-to-image | Creating new artwork using an uploaded image as a reference. |
| Production file | The artwork file used in the printing workflow. |
Revised 14 November 2026