
Background Removal and Cropping in PrintGear (PRO)
Background removal helps make customer images ready for a product. In the PrintGear designer, it works alongside cropping to turn an upload into a more focused design. Here is what each tool does and why the small details matter for a print shop.
Background removal: keep the subject, remove the scene.
A clean cutout has to do more than trace a simple outline. Loose hair and the open spaces between bicycle spokes make the difference visible. Compare the original photo with the cutout example below.
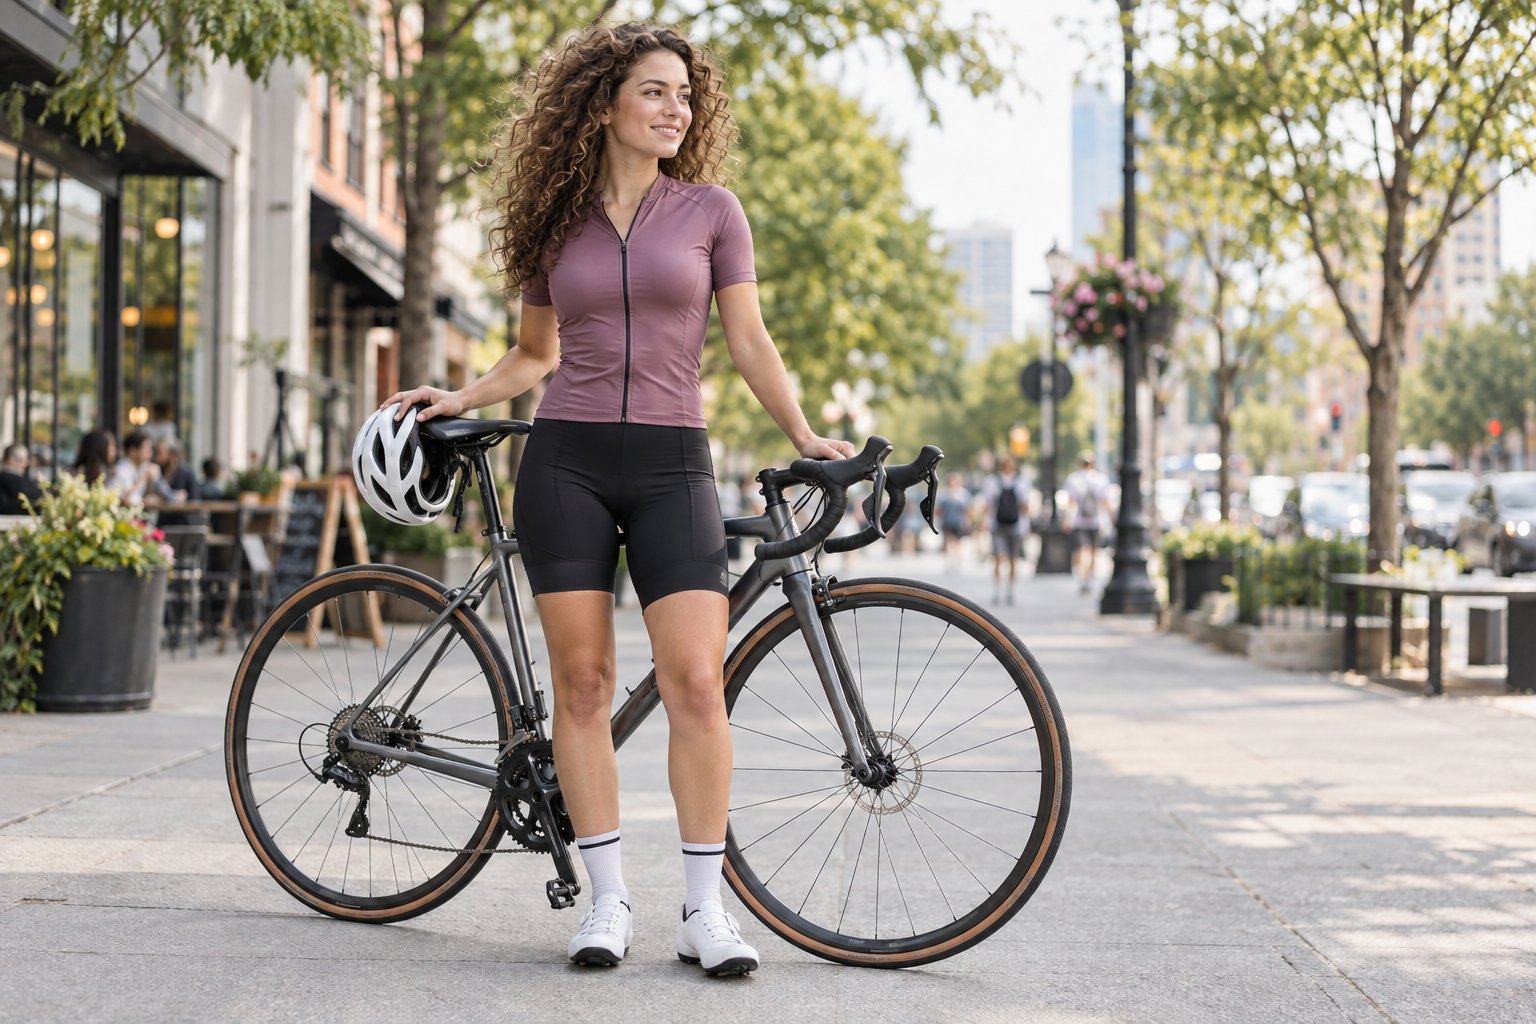
Before
The uploaded photo
The street is part of the original image. Hair, handlebars and fine spokes overlap the surroundings.
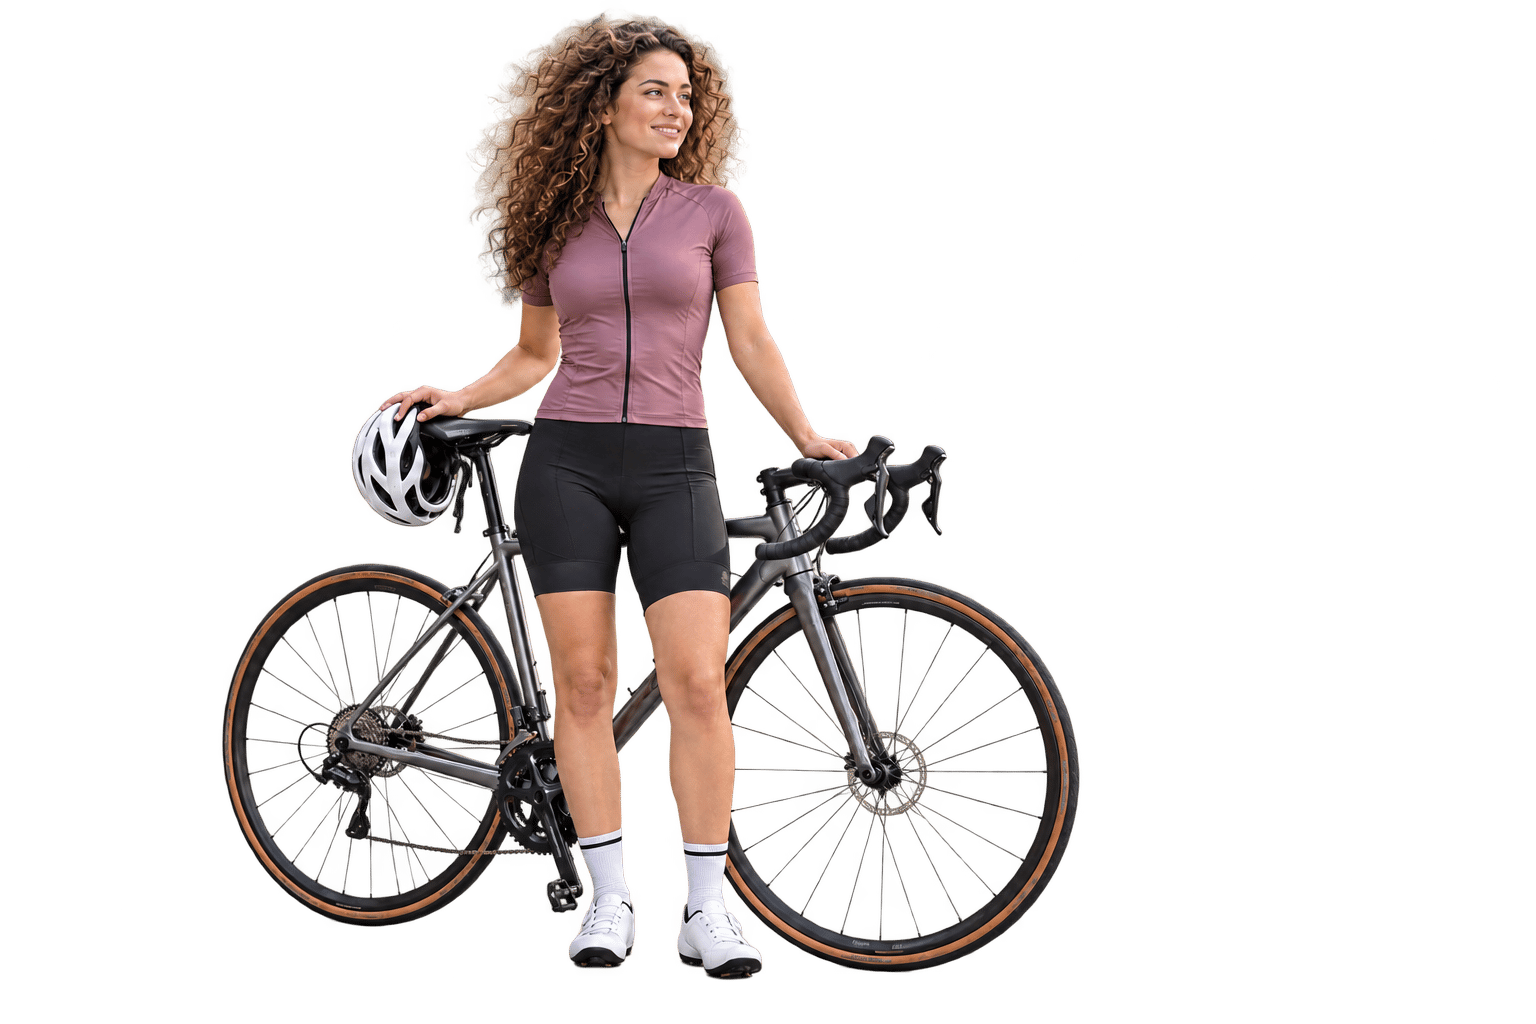
After
A transparent cutout
The subject can stand apart from its original surroundings. Look closely at the hair and the gaps within the wheels.
Illustrated example, not a PrintGear export. Try Remove background with your own image in the live designer.
Why background removal matters in a print shop
Background removal gives a customer-uploaded image a cleaner shape on a garment or another suitable product. It can reduce the unwanted rectangle around a photo, while keeping the person or object that should be printed. Fine details still deserve a visual check: contrast, stray hair and spokes can affect an edge.
PrintGear places the action next to the selected image in the designer, so the edited result can be reviewed in the product preview.
Crop the image to its useful area
Crop is a separate tool. Select an uploaded image, choose Crop, drag the blue handles around the part you want to keep, and apply. The example below shows how a wider photo can become a tighter composition around the rider and front wheel.
Choose the area
Move the crop handles to frame the subject.
Keep the focus
Apply the crop and review the composition on the product.
Cropping changes the composition; background removal isolates the subject.
Try both image tools
Upload an image in the PrintGear demo, select it, and try Remove background or Crop in the Image panel.